
I then airbrushed the Tamiya XF-82 RAF Ocean Grey along these areas first, before flipping
the model right side up and covering the majority of the upper surfaces with
this color. I also removed the paper towel from the cowling so I could position the magnetized cowl panels, so that in painting the camouflage pattern, it would line up on these pieces.
You’ll see just a bit of primer around the cockpit area, because I new this was a place that would end up being painted green. All Ocean Grey areas received the usual post shade treatment as described earlier: base color, a darker version of base color and then a lightened version of the base to go on the highlighted areas.

I used a pencil to mark where the camouflage of Tamiya
XF-81 RAF Dark Green would go, carefully matching the pattern drawings. Using the pencil lines as a guide, and with my
Tamiya HG SF double action airbrush set on as fine a pattern as I could
sustain, I started laying down the color separations, free hand by airbrush.
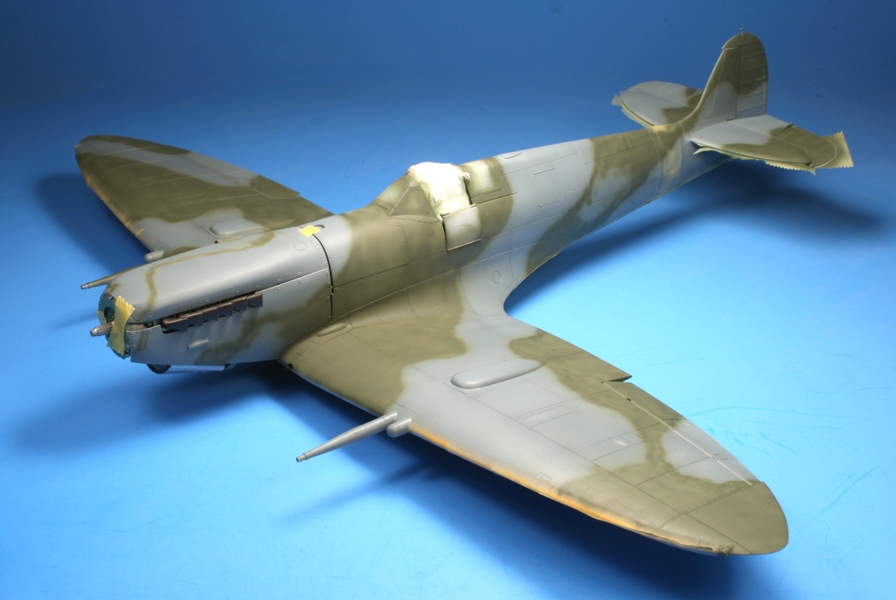

I
found myself spraying Dark Green into the body of these areas because I didn't want to get confused about which side of the pencil lines to paint! This is something you really want to pay attention to, particularly if your vision is caged inside of an optivisor; you occasionally need to pop up to take look around the model to make sure you are still spraying in the right place. I sprayed the paint into the insides of all
the Dark Green blotches until the color density was gradually built up. I also painted the cowling panels and the
canopy frames off the model. Once I had
the Dark Green on, it too received the subtle post-shade treatment.

Some touch up is required here and there, with both colors. Just keep at it, correcting the goofs as you find them until you find your happy place.
And so there you are, a nearly complete painted Spitfire model. Next,
peel away the masks! Not entirely unlike
unwrapping a Christmas present, and just about as much fun.
Happy modeling,
Marty
No comments:
Post a Comment
Note: Only a member of this blog may post a comment.